Network Security - Part 6: Web Proxies
Let’s take a step back and look at the environment we have created so far. We have both network and host-based firewalls to control traffic flowing between different networks, especially traffic coming in from untrusted zones. We even added a DMZ to isolate publicly exposed services (such as web servers) from the rest of the environment. But what if one of our users goes to a malicious website and downloads malware that then spreads throughout your internal network? What if your CFO gets tricked into clicking on a phishing link and gives away his or her credentials to an attacker?
Users spend the majority of their time on the open web, visiting websites or accessing online services such as Google or Office 365. Though unrestricted internet access gives users the ability to be productive, it also exposes your network to an increasing number of threats such as phishing sites, ransomware, or crypto-currency miners to name a few.
Companies have implemented URL filtering for several years with the goal of protecting users from visiting unproductive or harmful sites. One way of implementing this security control is to use fine-grained firewall rules. Some people prefer to use a DNS service with filtering capabilities such as OpenDNS. In this post however, we will install and configure an open-source web proxy, called Squid, to filter HTTP traffic originating from our network.
Benefits of Using a Web Proxy
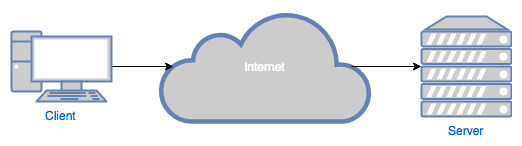
In essence, a web proxy is an intermediary machine between a client and the actual server. The whole internet was designed around the client-server model, where the servers typically provide a service (e.g. email) or a resource (e.g. web page) to the clients:
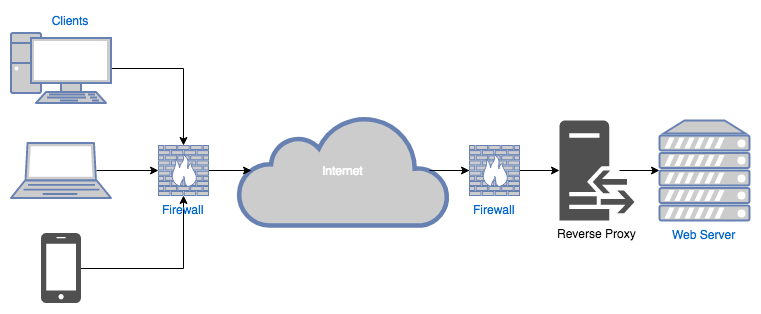
Proxies can either be placed in front of the server (called reverse proxies ):
On the other hand, proxies located at the edge of the client’s network are called forward proxies :
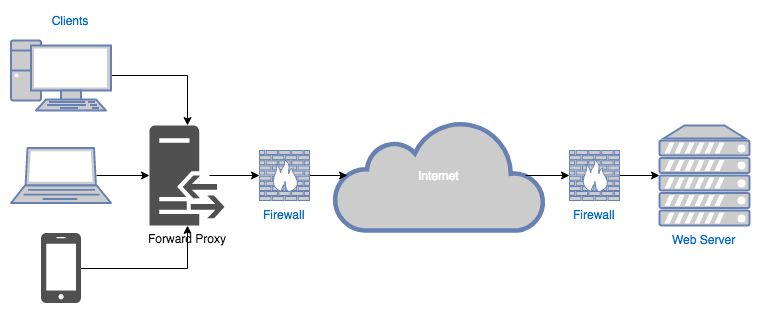
We will only discuss forward web proxies on this post since our goal is to control traffic leaving our network (i.e. forwarded into the internet).
Web proxies are typically used for the following reasons:
- Performance : proxies can cache web requests to improve speed.
- Logging : proxies can be configured to log every HTTP request that goes through them. This log trail can be very helpful for auditing and/or forensics purposes.
- Content-filtering : proxies can also be configured to block unwanted traffic.
Though performance plays a very important role and should be a factor when choosing and configuring your web proxy, this series is called “Network Security” for a reason, so we will explore the last two features for the remainder of this post.
Installing and Configuring Squid
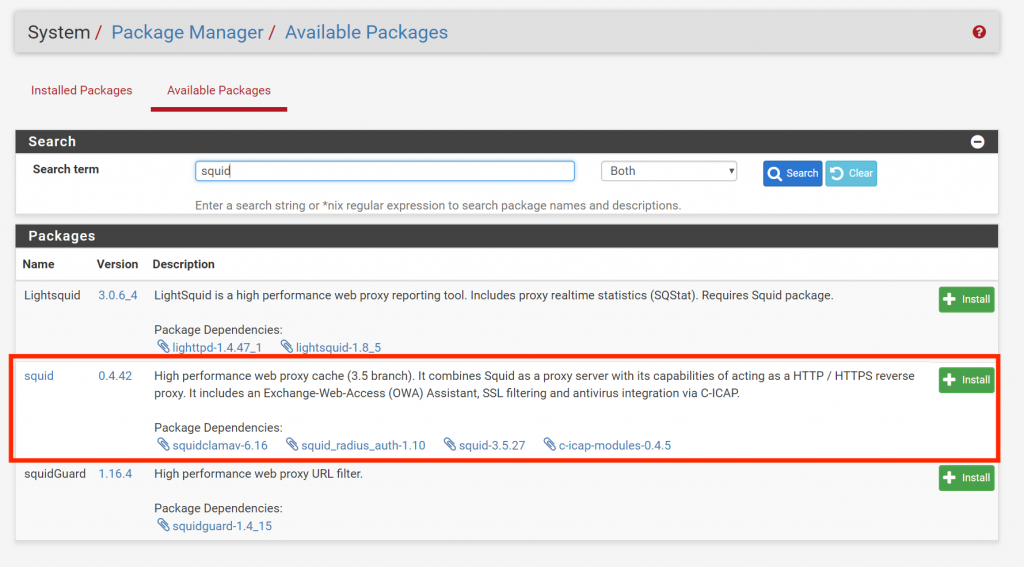
Log in to the pfSense admin console. Go to System > Package Manager > Available Packages and search for “Squid”:
Go to Services > Squid Proxy Server > Local Cache. Do not make any changes and click Save (for some strange reason Squid requires you to save the Local Cache settings before making any other changes).
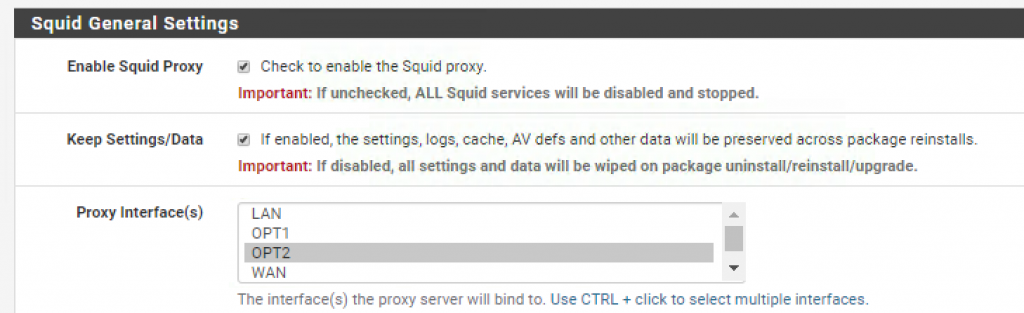
Go to _Services > Squid Proxy Server > General Settings _and enable Squid for the internal network (OPT2):
Scroll down and enable the _Transparent HTTP Proxy _feature:
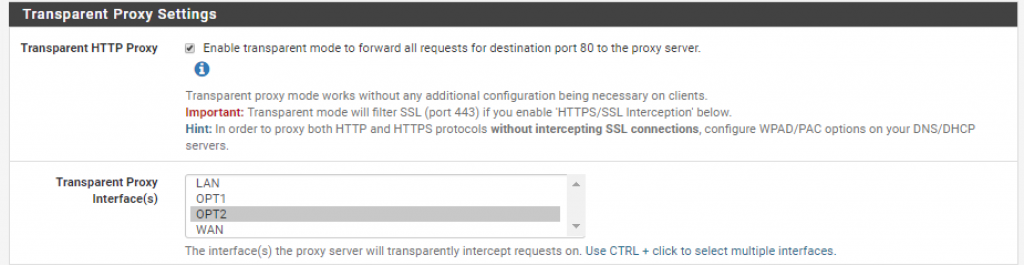
*As described in the text help, transparent proxies don’t require any special configuration on the client side making them an easier option to deploy
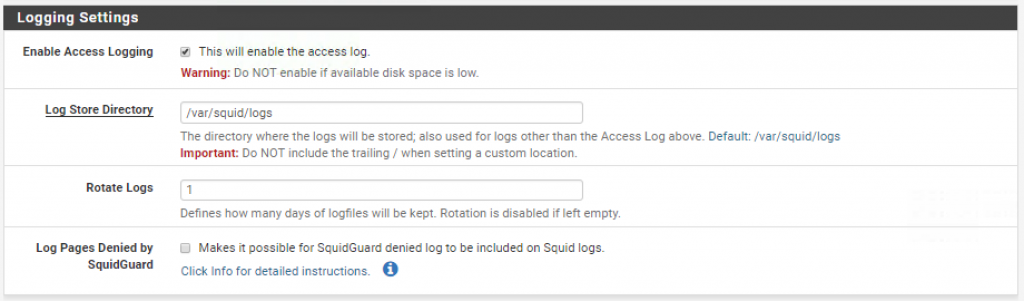
Finally, enable logging and log rotation to avoid running out of disk space:
Save your changes.
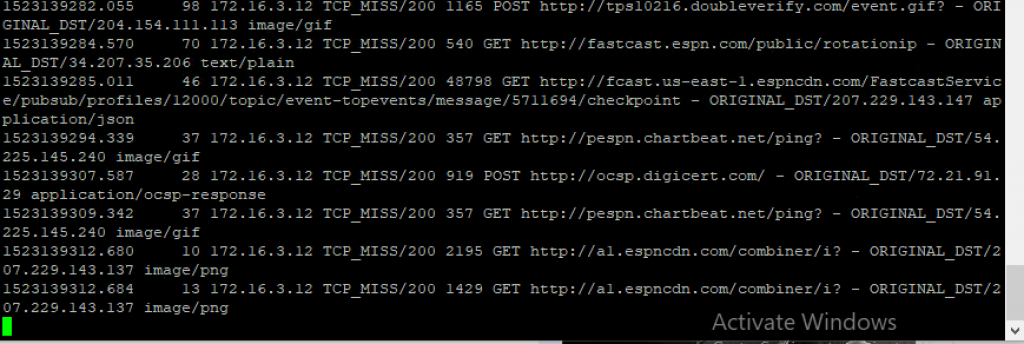
To test the configuration, ssh into the pfSense box, select option “8) Shell” and run the following command to start tailing the Squid access logs:
$ tail -f /var/squid/logs/access.log
Log into you nslClient box, open Firefox, and access a website (e.g. “http://www.espn.com”). You should start seeing HTTP requests coming through the proxy (yes, that is how many requests it takes to load a single page):
URL Filtering
We are ready to start blocking unwanted sites (and irritate our users). Go back to the pfSense management console and navigate to Services > Squid Proxy Server > ACLs.
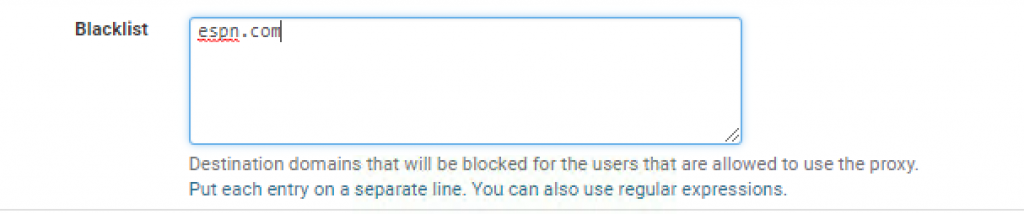
Go ahead and add espn_.com_ to the Blacklist:
Now try accessing “http://www.espn.com” again:
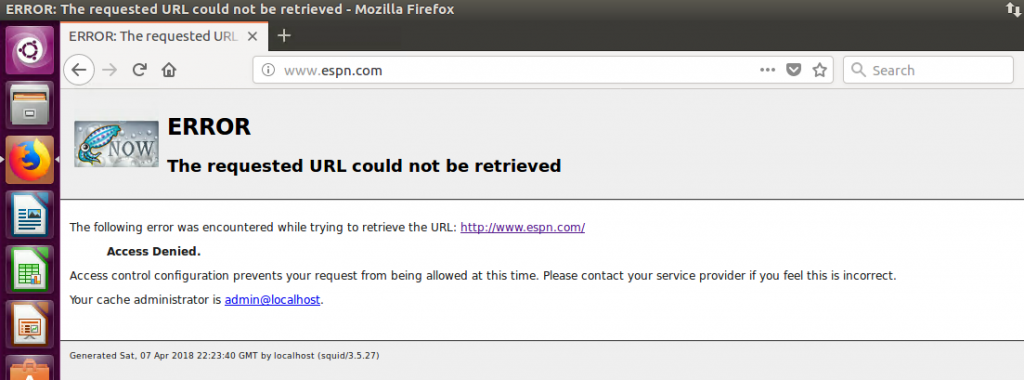
Oops…access denied. This is of course a very basic example and you will never want to configure your web proxy this way (unless you want to get fired) but you see where are going with this.
Filtering HTTPS Traffic
If you stare at the access logs long enough, you might notice that all the destination URL’s are non-secure HTTP addresses. But what about HTTPS requests? Where did those go?
HTTPS traffic is encrypted by design to prevent against eavesdropping attacks. However, that creates a huge blind spot for us since the majority of websites today use HTTPS. Let’s configure Squid to intercept HTTPS traffic using a technique called man-in-the-middle (MiTM).
*I know it sounds scary, and it should! MiTM is a technique commonly used by hackers to intercept encrypted communications. If you decide to use this technique within your network perimeter make sure your users are aware that all their web activity, including encrypted traffic, is being monitored.
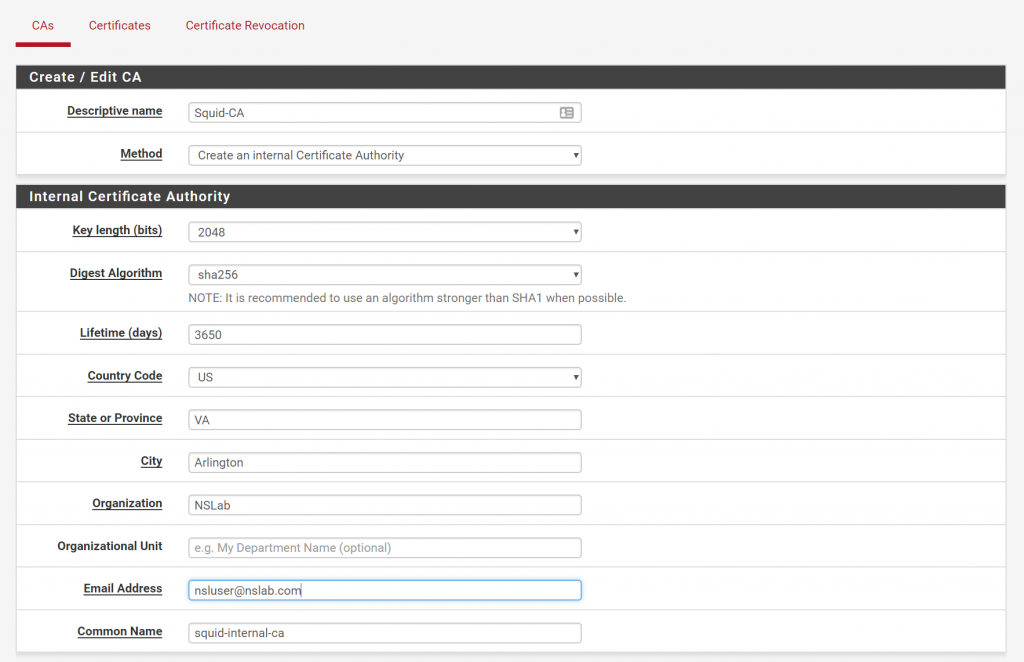
First, we need to create an internal certificate authority (CA). Log in to pfSense, go to System > Cert. Manager _and click on the _Add button to generate a new CA.
Enter the following settings (or similar) and click Save:
Click on the export icon to download the certificate. We now need to install the CA certificate into our nslClient VM so that it trusts certificates generated by the Squid proxy.
Transfer the Squid-CA.crt file to the nslClient VM using a shared folder, or a program like WinSCP. SSH into the VM and create a directory for internal CA certificates inside /usr/share/ca-certificates:
$ sudo mkdir /usr/share/ca-certificates/internal
Copy the Squid-CA.crt file to this directory and run the following command to force Ubuntu to load the certificate:
$ sudo dpkg-reconfigure ca-certificates
You will be prompted with the following screen:
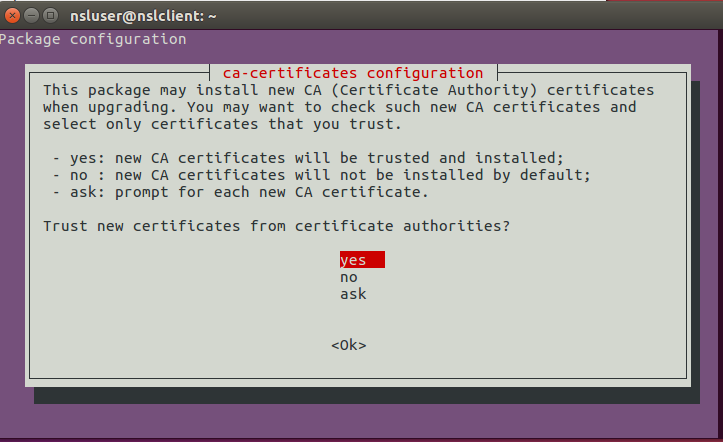
Select “yes”.
In the next screen, use the arrow keys to place the cursor on “internal/Squid-CA.crt” and press the space bar to activate it:
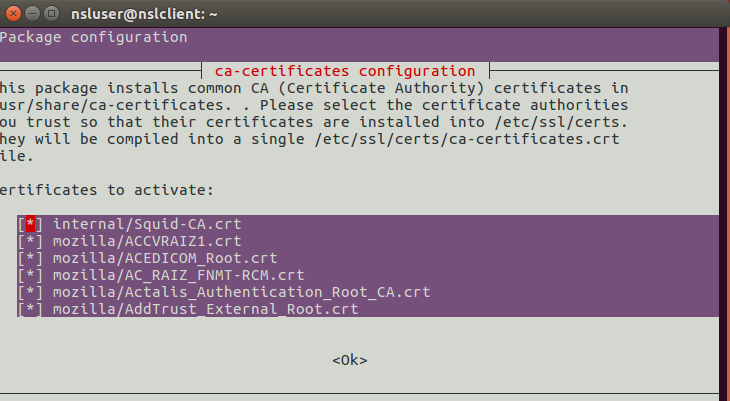
Congratulations, your CA root certification has been loaded into the Ubuntu’s certificate store. There is one problem though. Some browsers, such as Firefox, use their own certificate store instead of the one that comes with the OS.
Open Firefox, type about:preferences#privacy in the URL bar and click on View Certificates:
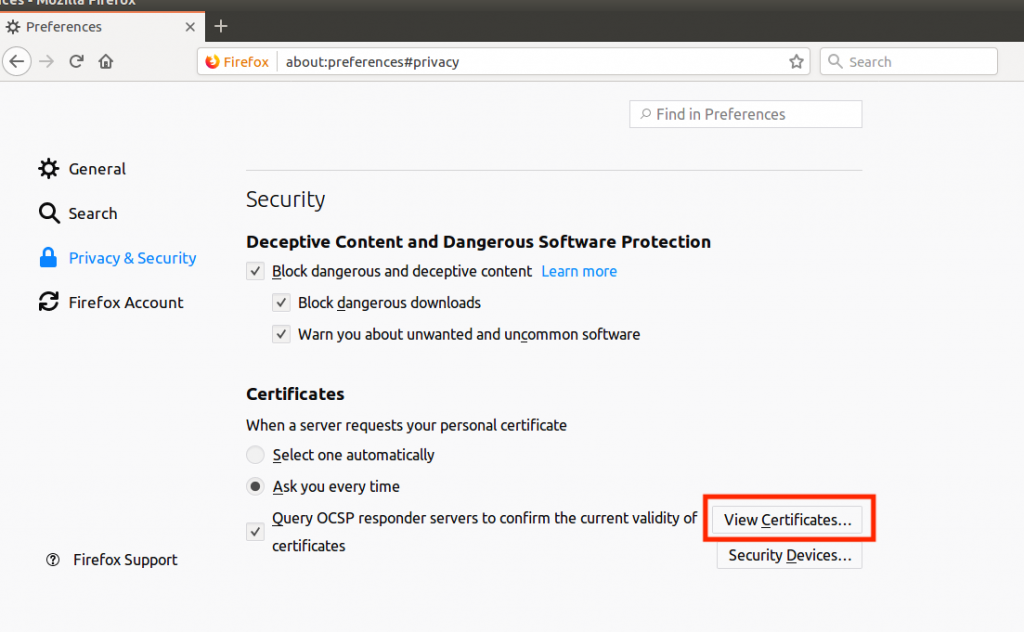
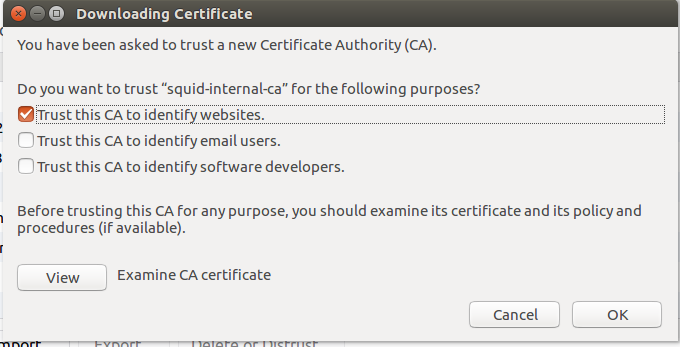
Import to the Squid-CA.crt file and select “Trust this CA to identify websites”:
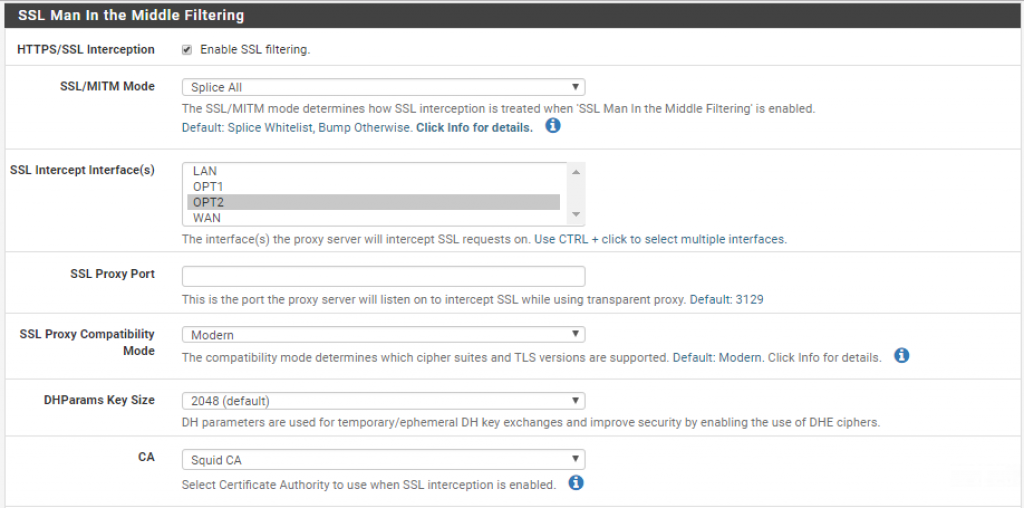
Finally, we need to enable SSL interception. Go back to the pfSense dashboard and navigate to Services > Squid Proxy Server and enable SSL interception for the OTP2 interface:
You should now be able to see SSL traffic in the Squid access logs.
Using a Blacklist Database
Wouldn’t it be nice if somebody had already created a database of URLs and domains, organized by content type, that are commonly blocked? Stop wondering because that’s exactly what SquidGuard does.
SquidGuard is a complementary package that run on top of Squid and provides fine-grained control over what web resources may be accessed by clients. This includes the ability to use publicly available blacklists.
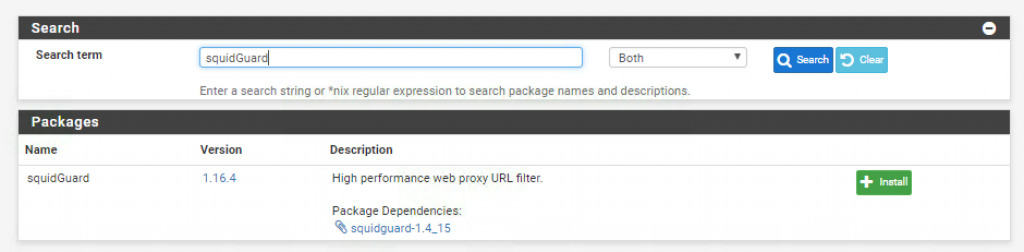
Go ahead and install the SquidGuard package:
Once the package is installed navigate to Services > SquidGuard Proxy Filter and enable the service:

Enable logging and log rotation:

And select the following blacklist database (http://www.shallalist.de/Downloads/shallalist.tar.gz):
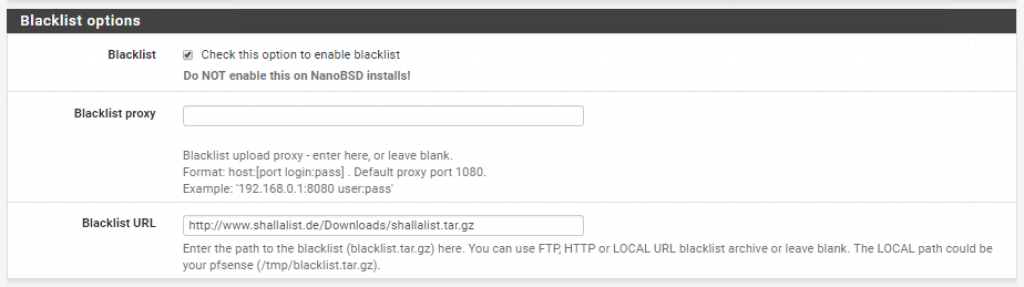
*There are of course other databases available. Feel free to use the one that best first your needs.
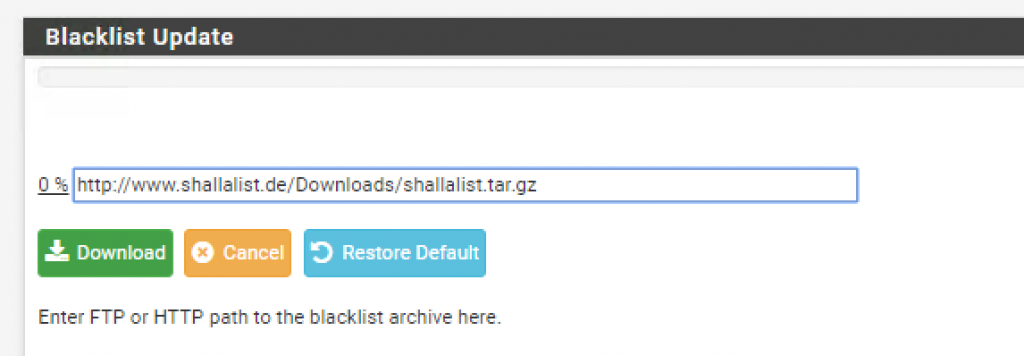
Go to Blacklist and download the database files:
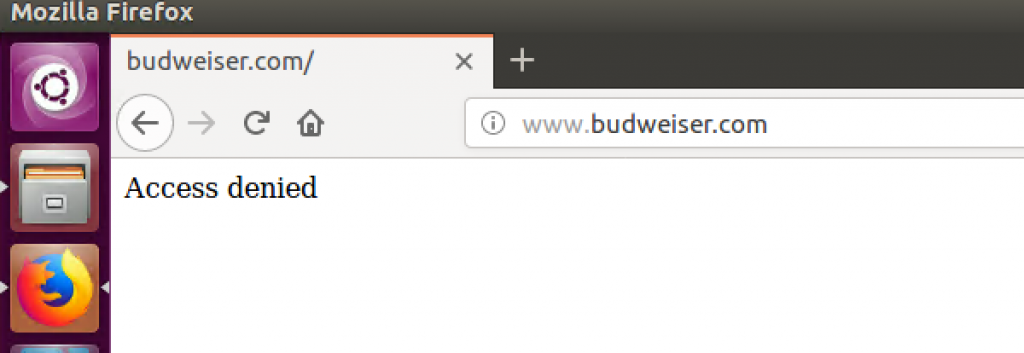
Now that the database has been downloaded go to Common ACLs and expand the Target Rules List. _Here you will find several categories of URLs that you can deny access to. Just to show you how it works, I decided to block access to alcohol related websites _(!blk_BL_alchohol) and allow access to everything else (all).
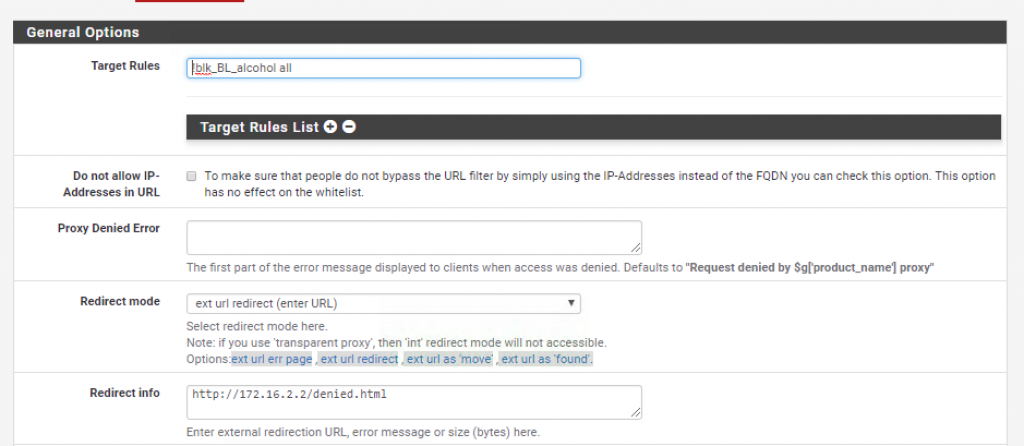
Notice how I also decided to reroute denied traffic to my own denied.html page.
Save your changes and try to access Budweiser’s website from the client VM. The request should be redirected to whatever page you specified above:
Final Thoughts
Web proxies might not be the most sophisticated technology out there. Some people might even argue that they don’t provide much protection against advanced attackers. And even though I pretty much agree with those comments the reality is that proxies are usually pretty simple to deploy, there are lots of free open-source versions available and, when configured properly, can provide great security benefits to your overall security program.