Network Security - Part 5: Network Segmentation (DMZ)
In Part 4 of this series, I talked about the importance of host-based firewalls to protect against lateral movement between host co-located on the same network. Though that was a great improvement, there are still some critical design issues with our network architecture:
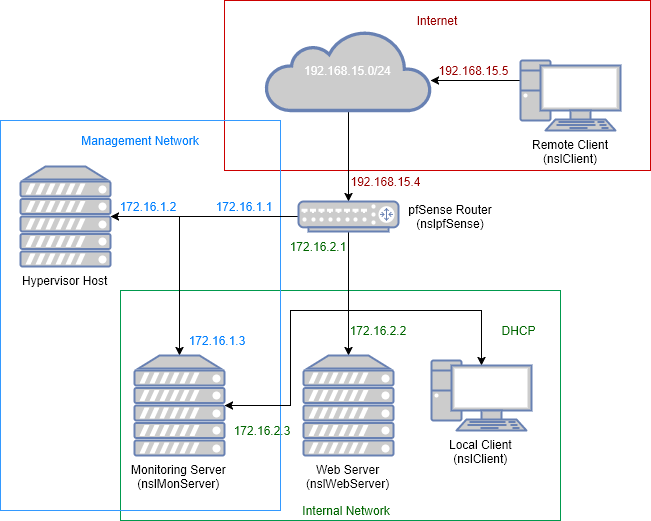
There is only one internal subnet (green network) where all devices live. Servers, workstations, printers, smart phones…everything is connected to the same network. Our network is completely “flat” making it more difficult to manage and secure.
Segmentation is the process of breaking down a network into smaller zones or subnets. This approach provides many benefits including:
- Greater management and troubleshooting capabilities for network related issues.
- Better performance by reducing the amount of local traffic.
- Improved security by providing more visibility into traffic flowing across subnets and allowing architects to apply different security controls based on the devices connected to each zone.
Today, we are going to segment our network by creating a Demilitarized Zone (DMZ) that will contain all devices that should be accessible from the internet, such as our web server. This will allow us to separate devices that are more likely to get compromised from the rest of the network.
DMZ Network
We need to add a second internal network (orange) to our environment:
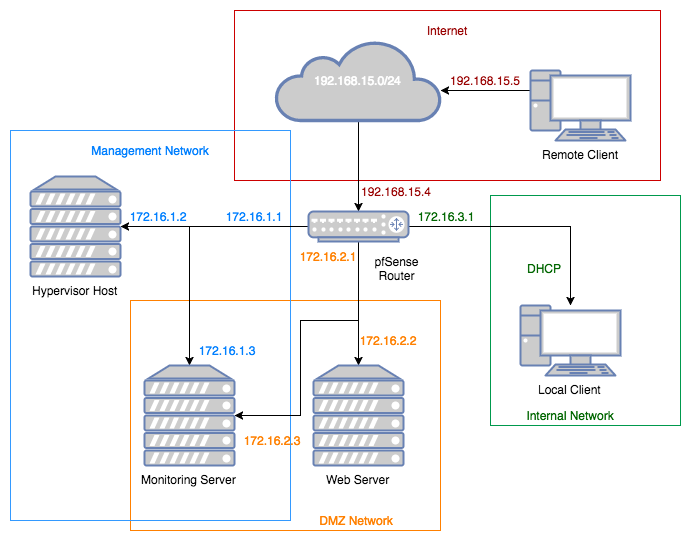
In reality, we will rename nslInternal to nslDMZ and create a new network (172.16.3.0/24) with the same name (nslInternal).
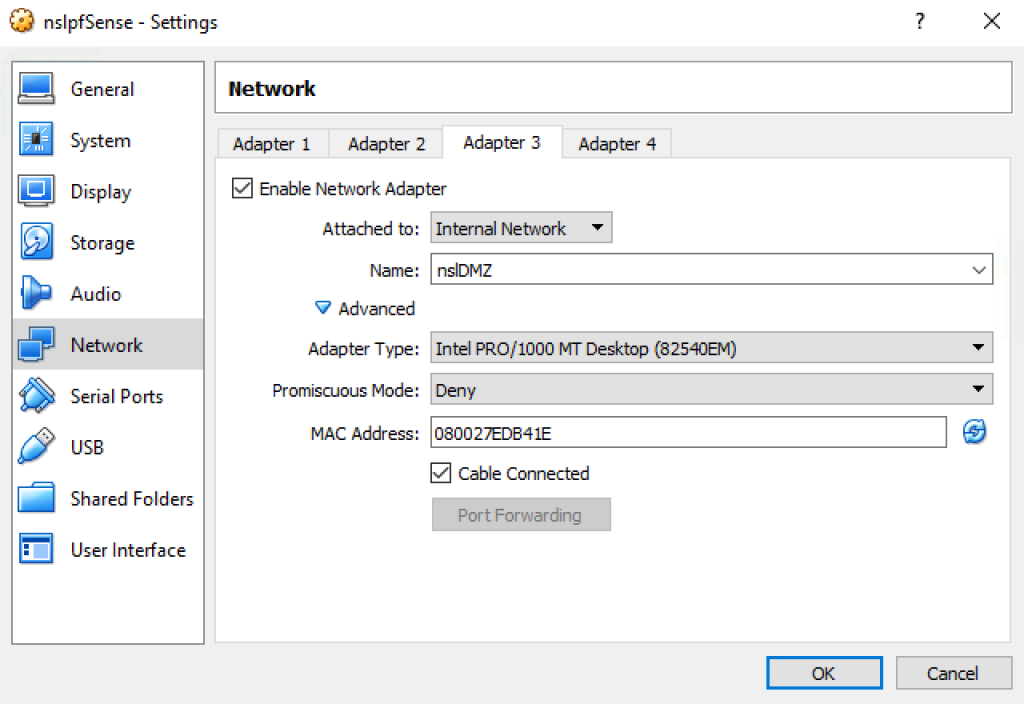
Stop all the VMs and edit the network settings for the nslpfSense VM. Rename Adapter 3 to “nslDMZ”:
Enable Adapter 4 with the following configuration:
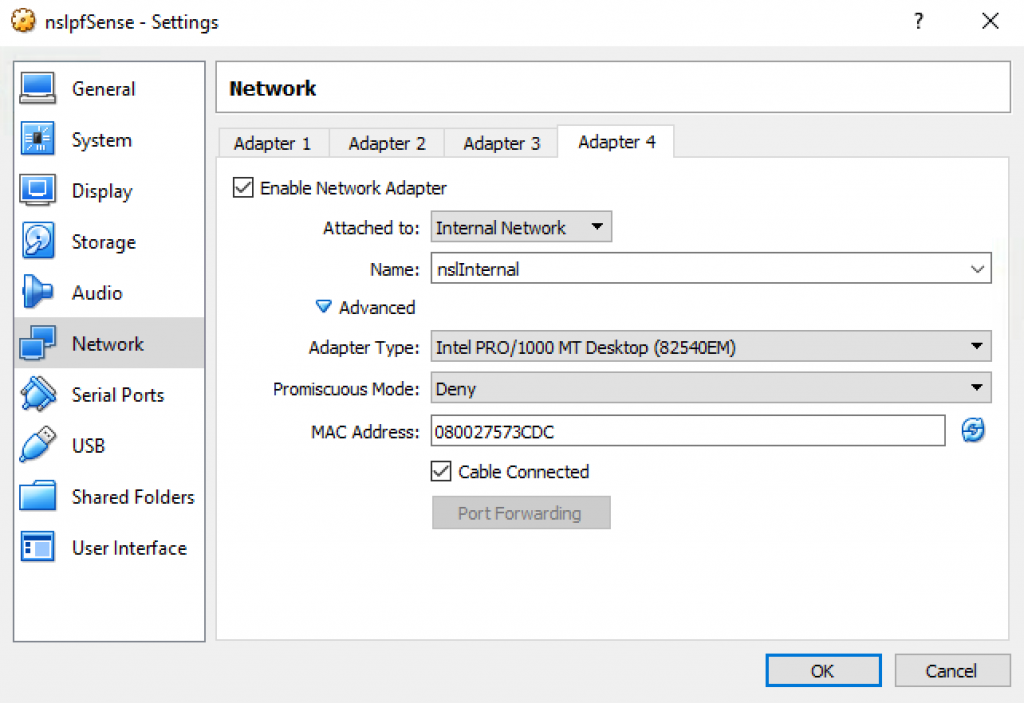
*To avoid having to reconfigure all the firewall rules I decided to attach the DMZ to the existing Adapter 3 and move nslInternal to the new Adapter 4.
VirtualBox will generate different MAC addresses for your environment but at the end your should have four network interfaces:
| VirtualBox Network | pfSense Interface | MAC Address | IP Address |
|---|---|---|---|
| nslInternet | em0 | 08:00:27:36:70:56 | 192.168.15.4 |
| VirtualBox Host-Only Ethernet Adapter | em1 | 08:00:27:42:7a:36 | 172.16.1.1 |
| nslDMZ | em2 | 08:00:27:ed:b4:1e | 172.16.2.1 |
| nslInternal | em3 | 08:00:27:57:3c:dc | 172.16.3.1 |
Start pfSense in headless mode and log into the admin console. Once logged in, go to Interfaces > Assignments:
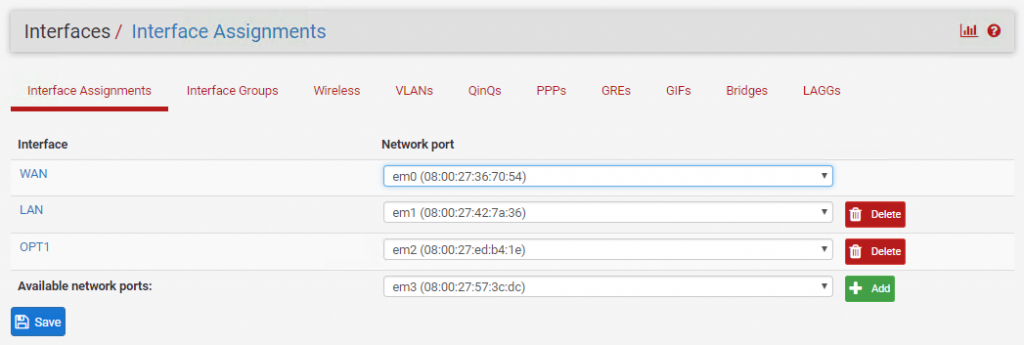
The new interface (em3) should already be available. Click Add and save your changes.
SSH into the pfSense box and select option 2 “Set Interface(s) IP address”, and then option 4 “OPT2 (em3)”:
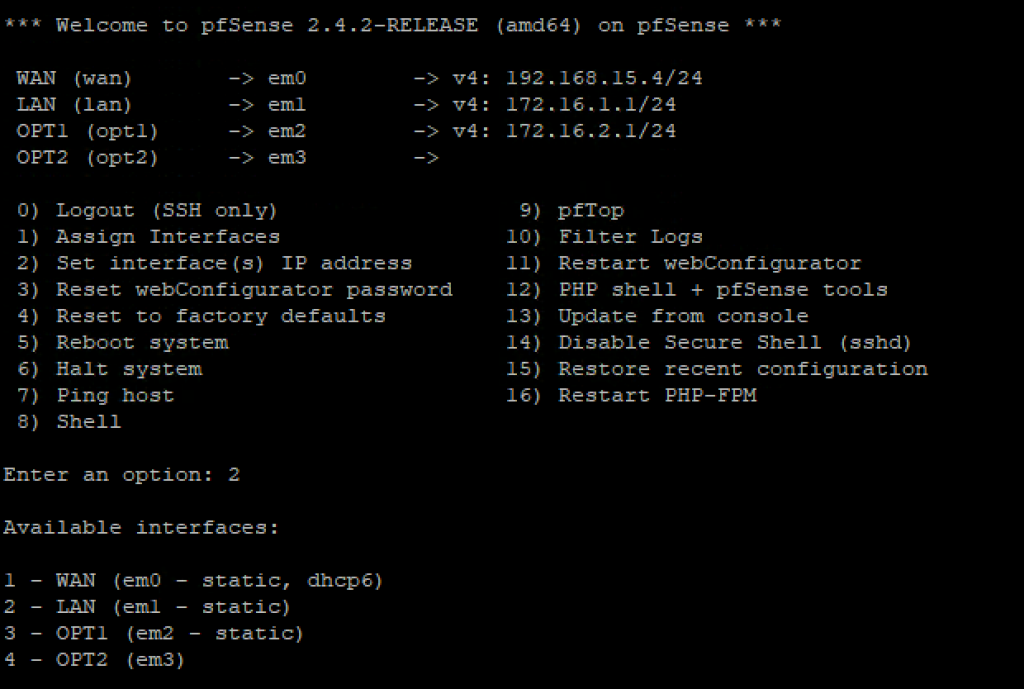
You will be asked a series of questions to configure the new interface. Enter the following answers:
| Enter the new LAN IPv4 address | 172.16.3.1 |
| Enter the new LAN IPv4 subnet bit count | 24 |
| Enter the IPv4 upstream gateway address | Leave Blank |
| Enter the new LAN IPv6 address | Leave Blank |
| Do you want to enable the DHCP server on LAN? | yes |
| Enter the start address of the IPv4 client address range | 172.16.3.12 |
| Enter the end address of the IPv4 client address range | 172.16.3.254 |
| Do you want to revert to HTTP as the webConfigurator protocol? | no |
Network Services
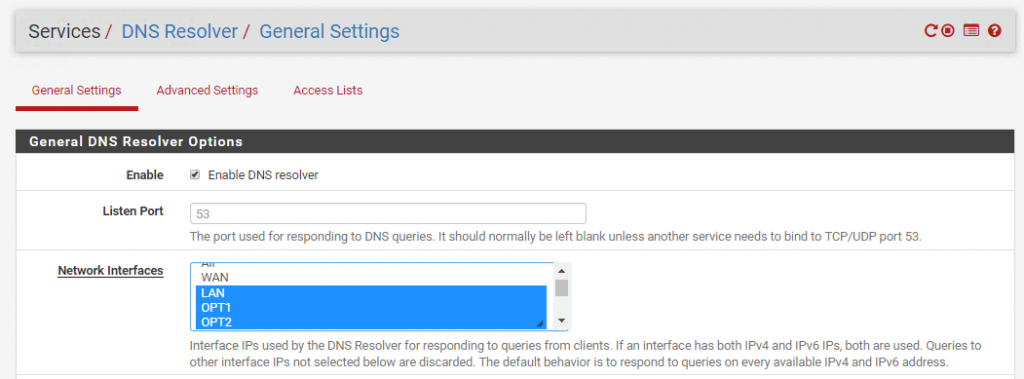
Let’s enable DNS and NTP for the nslInternal network. From the pfSense admin dashboard go to Services > DNS Resolver, highlight OPT2 and save the changes:
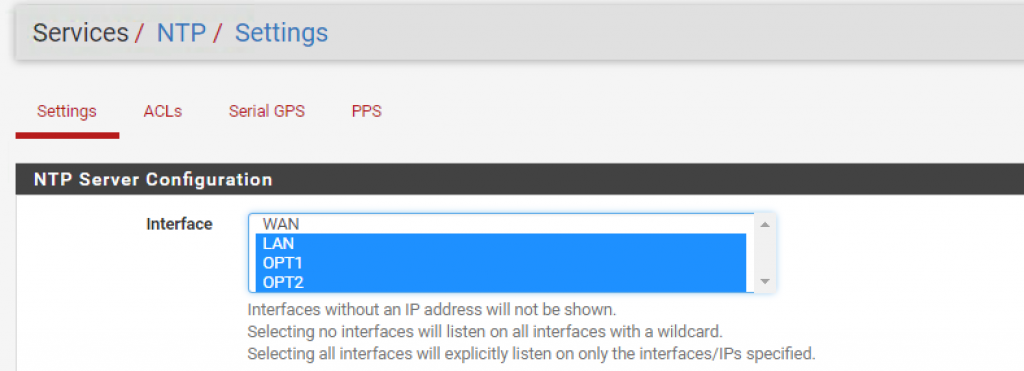
Then, go to Services > NTP Server and enable NTP for the OPT2 interface:
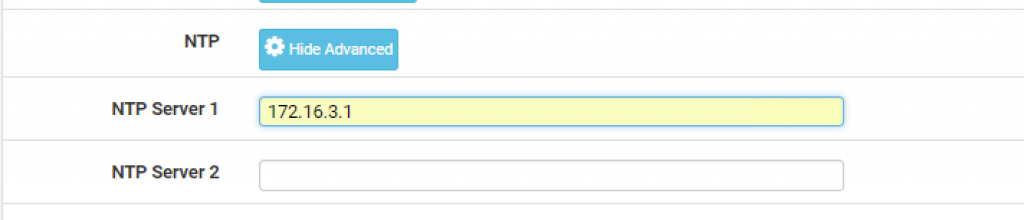
Finally, go to Service > DHCP Server > OPT2 and add 172.16.3.1 as the primary NTP server:
Firewall Rules
There are currently no firewall rules defined for our new OPT2 interface:
![]()
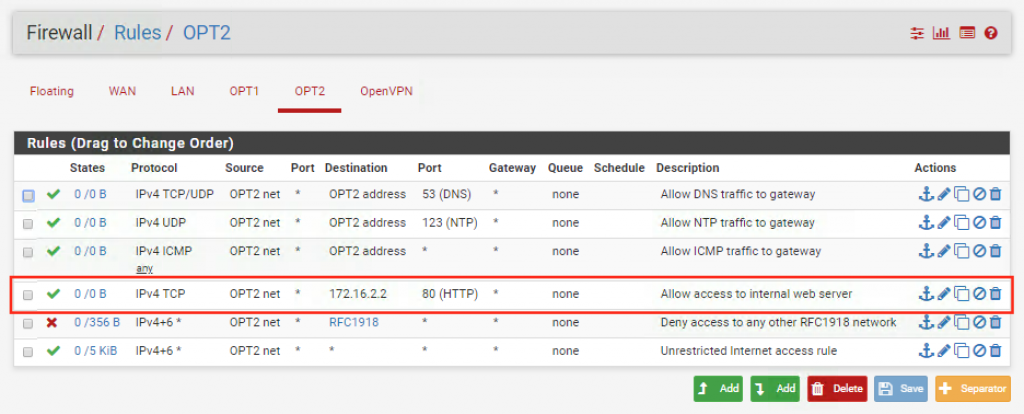
We just need to duplicate the rule set that we previously defined for OPT1. Make sure to use OPT2 net and OPT2 address instead of OPT1 net and OPT1 address respectively. In addition, we need to add a rule to explicitly allow access to the web server from the internal network:
Let’s also add a new rule to our management interface (LAN) to allow access to the OPT2 network:
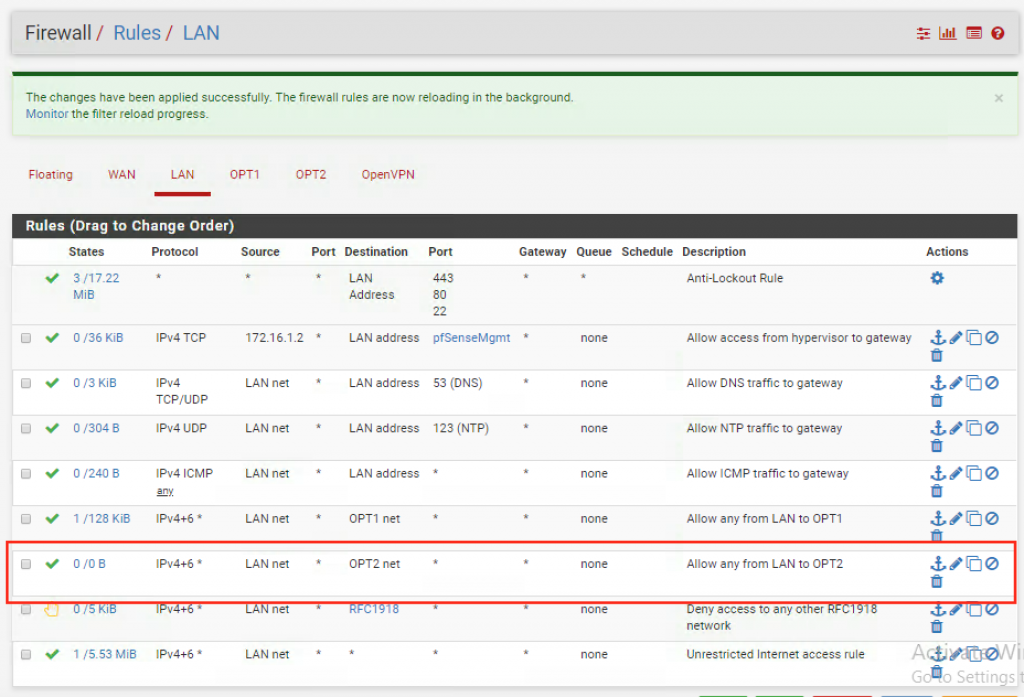
Make sure it shows up right above the “Deny access to any other RFC1918 network” rule.
We don’t have to make any changes to OPT1. However, since OPT1 is now our DMZ we could be a little bit more restrictive. We could decide to block any outbound traffic from the DMZ network to the internet. After all, our web server doesn’t need internet access, especially if you configure your servers to update/install software from a local repository.
You might be wondering why going through so much pain just to prevent servers in the DMZ from accessing the internet. Malware often communicates to external command and control servers over regular outbound traffic. The potential for an attacker to cause damage will be greatly reduced if internet access is denied. In addition, blocking outbound traffic might also prevent data exfiltration.
Since I don’t have the infrastructure in place to install software packages from a local repository I won’t block outbound traffic in my environment but it’s something you should consider when designing a real DMZ network.
Let’s Try It!
Now that we have our DMZ setup it’s time to update the other VMs and test the new configuration.
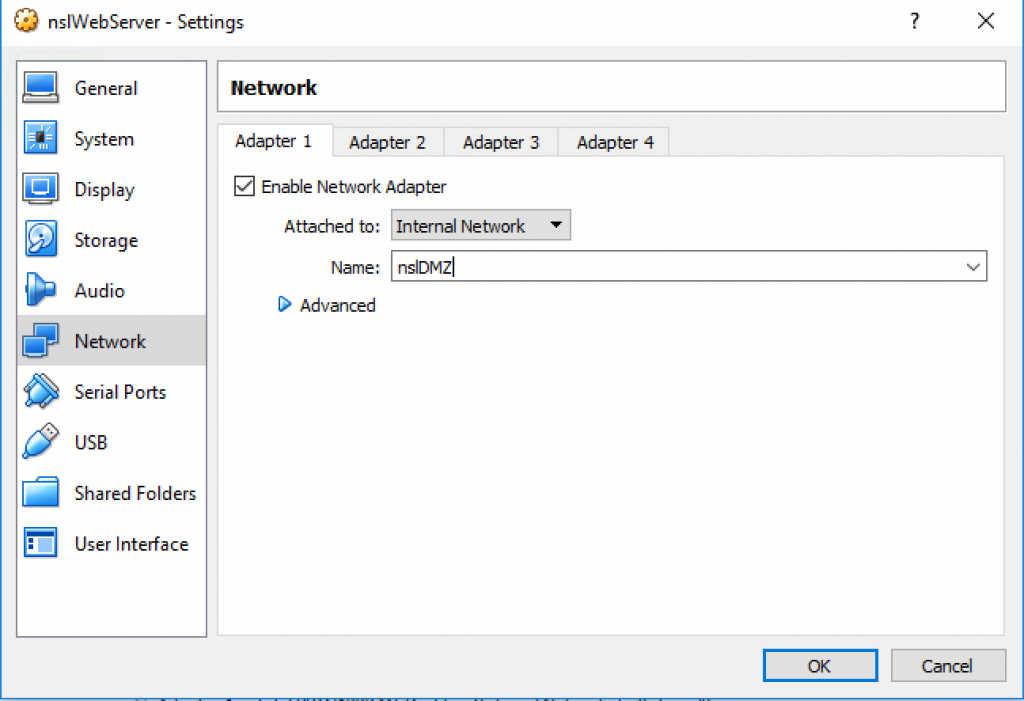
Move nslWebServer to the nslDMZ network:
Start the VM in headless mode and verify that you can still SSH into it:
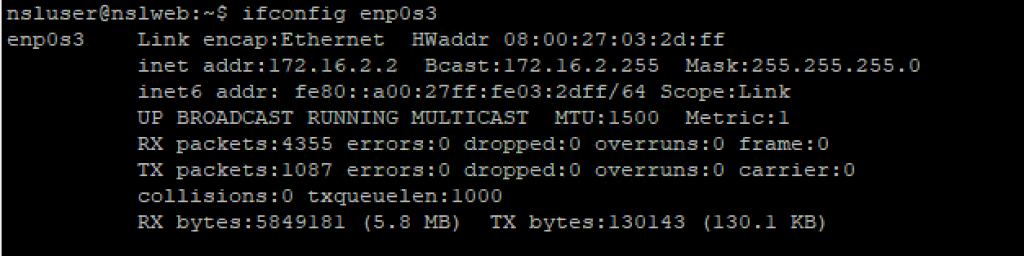
Once inside the VM, run the following commands to verify the DHCP settings:
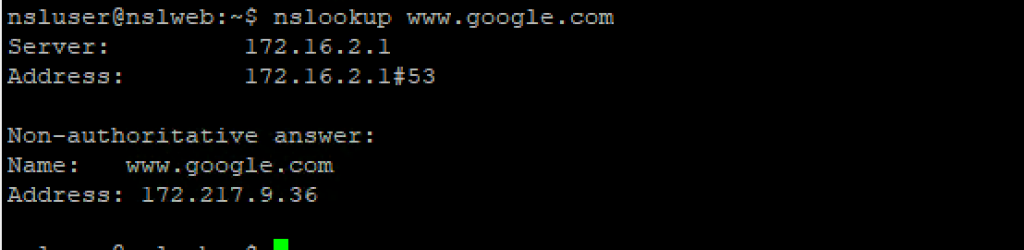
DNS settings:
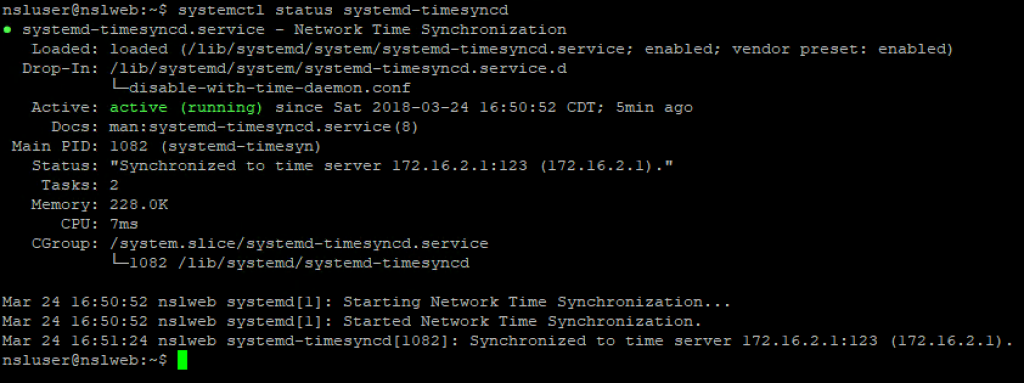
And NTP settings:
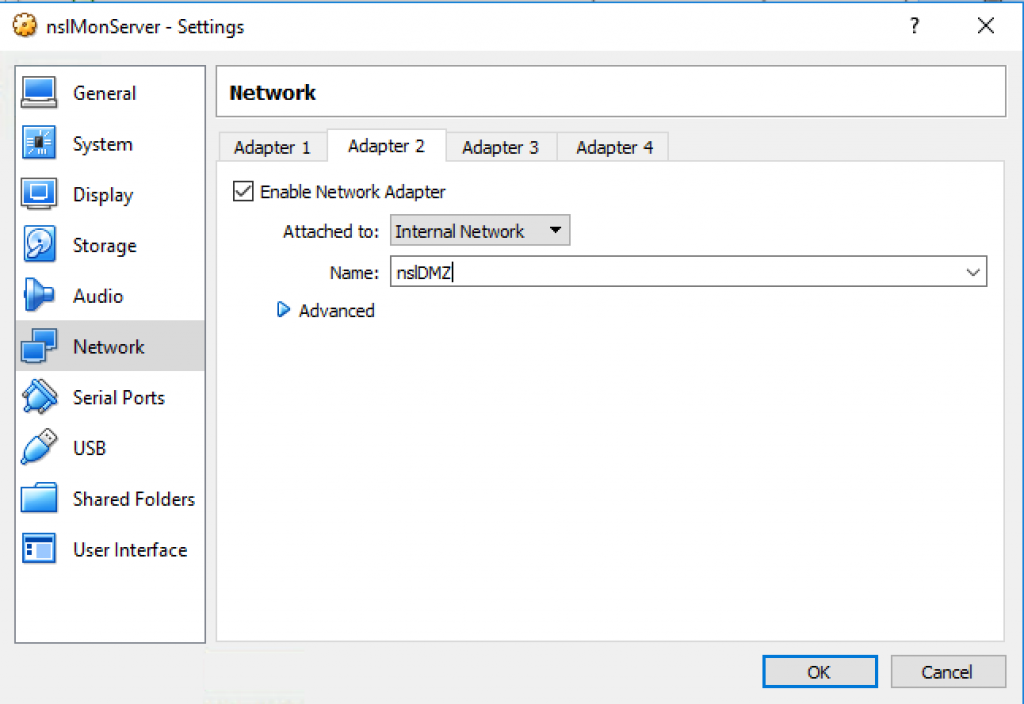
Similarly, update nslMonServer’s Adapter 2 and verify the network settings:
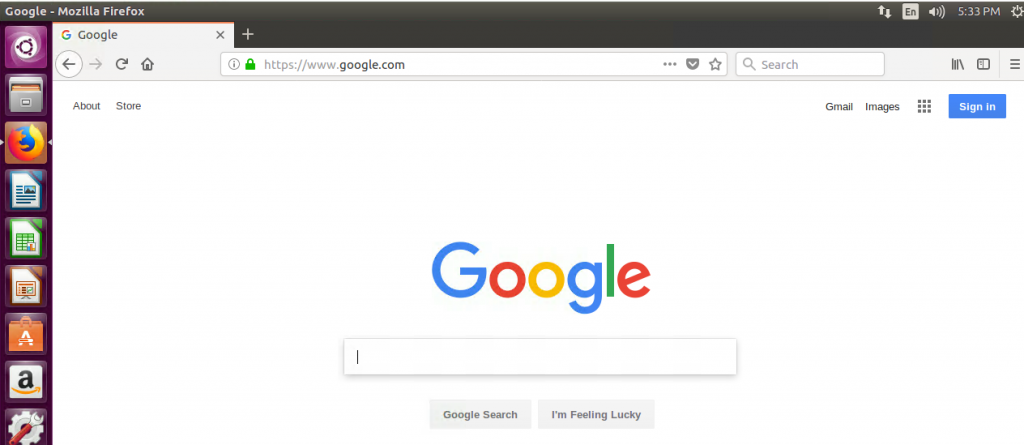
Finally, start the nslClient VM and make sure you can still connect to the internet:
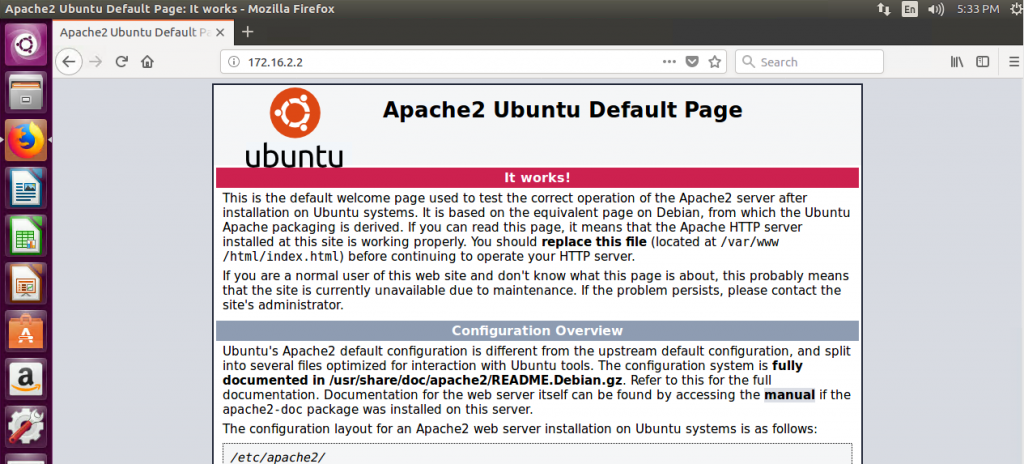
And that you can access the web server internally:
Final Thoughts
Segregation can also be achieved by means other than firewalls such as VLANs, Software-Defined Networking, or a combination of the three. pfSense provides support for VLANs and I encourage you to play around with them.
Our network is looking much better but there is still a lot of work to be done so stay tuned for my next post!